
How to Install Ceiling Fans
Installing a ceiling fan can seem intimidating, but it’s a relatively simple process that most homeowners can manage themselves. In this post, we’ll walk you through installing a ceiling fan, from choosing the suitable model to wiring and mounting it. So read on for all you need to know about installing Ceiling Fans!
You Will Need:
Before starting, let us first look at what tools you will need to install a ceiling fan effectively.
- Tape measure
- Wire stripper/cutter
- Wrench set screw
- Level 2-ft.
- Needle-nose pliers
- Non-contact voltage tester
- Nut driver
- 4-in-1 screwdriver
- Hammer
Once you have the necessary tools, here are the materials you will need for your ceiling fan installation project.
- Ceiling fan
- Fan brace and box assembly
- Switch
- Wire connectors
Ceiling Fan Installation
Determine Location of the Ceiling Fan
- It should be installed at least 8-9 feet off the ground for optimal airflow, but you can get away with lower heights if needed!
- The blades must be at least 7 feet off the floor. Suppose you are installing high or sloped ceiling fans. In that case, it is recommended that there’s an extra long down-rod for adequate blade clearance -this will help ensure safety when using these types of devices in higher spaces without compromising their performance!
- Ceiling fan blades should be hung 8 to 10 inches below the ceiling.
- Keep your ceiling fan blades at least 18 inches away from the walls, doors, and cabinets. And posts too!
- Verify that the area around the site on the ceiling is not broken or damaged.
Turn Off Power
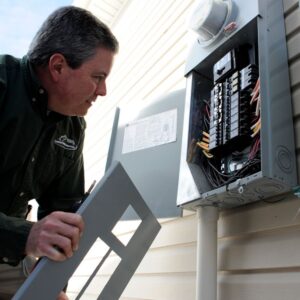
To turn off power for an existing fan or light, shut off the circuit at its main circuit breaker. If you have a variety of fixtures in your home, then simply shutting down these individual switches will also work!
Remove Light Fixture (Optional)
This is only applicable to those with a light fixture already. The first thing you need to do is remove the shade and light bulbs. You can use your cordless drill for this, but make sure not to touch any wires since they’re still hot! Once those are out of commission (and cooling), take another look at that fixture with an electrician’s voltage tester before starting on anything else- there might still be some good juice left inside, which could cause a fire if Little Misses touches it while you’re not looking (we’re not judging- we’ve all been there!).
Now that it’s safe unscrew the plate holding the fixture. With that out of the way, you should be able to see how everything is attached. Most fixtures typically have three parts: the base, the socket, and the shade.
Install Ceiling Fan Brace

Mounting an electrical box between two ceiling joists is a great way to hide your wiring while providing access for repairs. There are three different types of fan braces that you can purchase – retrofit, old-work, or remodel style; make sure the one bought matches what kind it will be installed in!
Use the stud finder to find a location between two studs, about six inches from the current ceiling box. The 4-inch hole saw should be used to make a hole while wearing eye protection and a dust mask. Reach inside the hole and remove any insulation or debris from the region above the drywall in the ceiling.
Insert the individual brace part into the hole, with its legs contacting the top of the drywall on the ceiling. Then, crank the brace by hand until it lengthens and fits snugly between the two joists. You may need a wrench for the last round to properly seat the brace between the joists.
Pull the electrical line from the old ceiling box through the new hole. Insert the wire through the knock-out holes in the box’s retrofit brace. Using the provided hardware, secure the box to the mount.
Cover the Old Box
Now that you have successfully removed all the wires, it is time to install the cover plate. If the old box is just supported by drywall, you might be able to remove it and fix the hole. If the old box is fastened to the side of a joist, removing it without firing a substantial portion of drywall will be difficult; in this instance, leave the parcel in place and cover it with a plate.
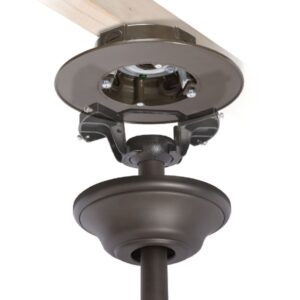
Install the Ceiling Fan Mounting Bracket
Almost all ceiling fans are installed in two steps: first, a mounting bracket is attached to the electrical box, and then the mass of the ceiling fan is inserted into the mounting bracket. This removes the need to hold a significant ceiling fan motor assembly overhead while screwing it into position.
Using the included screws, secure the mounting bracket to the electrical box. Check that the electrical supply cables (the wires used to power the ceiling light) are routed through the proper aperture in the mounting bracket.
Attach the Fan Canopy to the Fan Motor Assembly
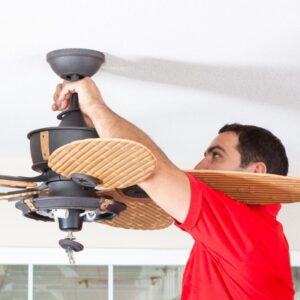
Attach the Fan Motor Assembly
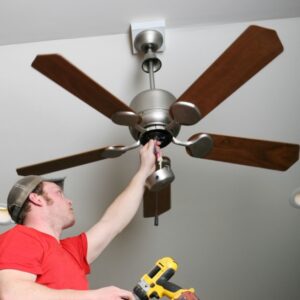
You may require assistance with this section. Slide the fan motor assembly into the mounting bracket while standing on the ladder until it is securely seated. To secure the fan motor assembly, use the supplied hardware. For the time being, leave the fan blades unattached.
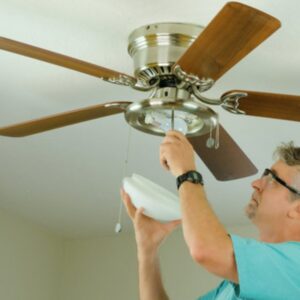
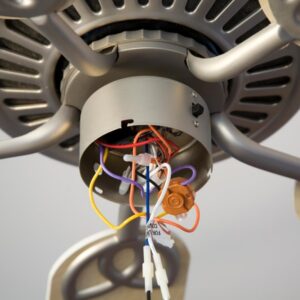
Ceiling Fan Wiring and Attach Fan Canopy
For specific electrical connections particular to your ceiling fan, consult the instructions. If you are uneasy with doing the ceiling fan wiring, get an electrician now. Slide the fan cover forward and secure it with the ornamental screws included in the package.
Attach the Blades

The ceiling fan blades are attached to the mount, which is connected with a blade. To install these properly, be careful not to round off any edges since they may cause wobbling when installing them on your unit!
After Installing

Here are the things you need to do after installing your new ceiling fan to ensure that you’ve done it correctly;
- Make sure the safety wire is securely looped and screwed onto the pipe.
- Check that every bolt, nut, flat washer, spring washer, and cotter pin is securely fastened and tightened.
- You must ensure the safety wire does not contact any part of your motor at an angle greater than 45 degrees.
- Make sure all the blades are tightly screwed.
- The gap between the roof and ceiling should be at least 5mm for air to run smoothly down.
Conclusion
There go! Those are the steps on how to install a ceiling fan. Installing a ceiling fan can be daunting, but following these simple instructions will make it a breeze. Make sure to take your time and double-check that all the screws are tight, and you’ll be enjoying the benefits of excellent air circulation in no time. Now that you are aware of how to install it, you should check out the top 12 best ceiling fans you can choose from. Thanks for reading!
Last Updated on
- How to clean standing fan easily - September 24, 2022
- How Long Does a Fan Last? – Electric fan Maintenance Guide - September 23, 2022
- Can electric fans be left on 24 hours a day? - September 23, 2022